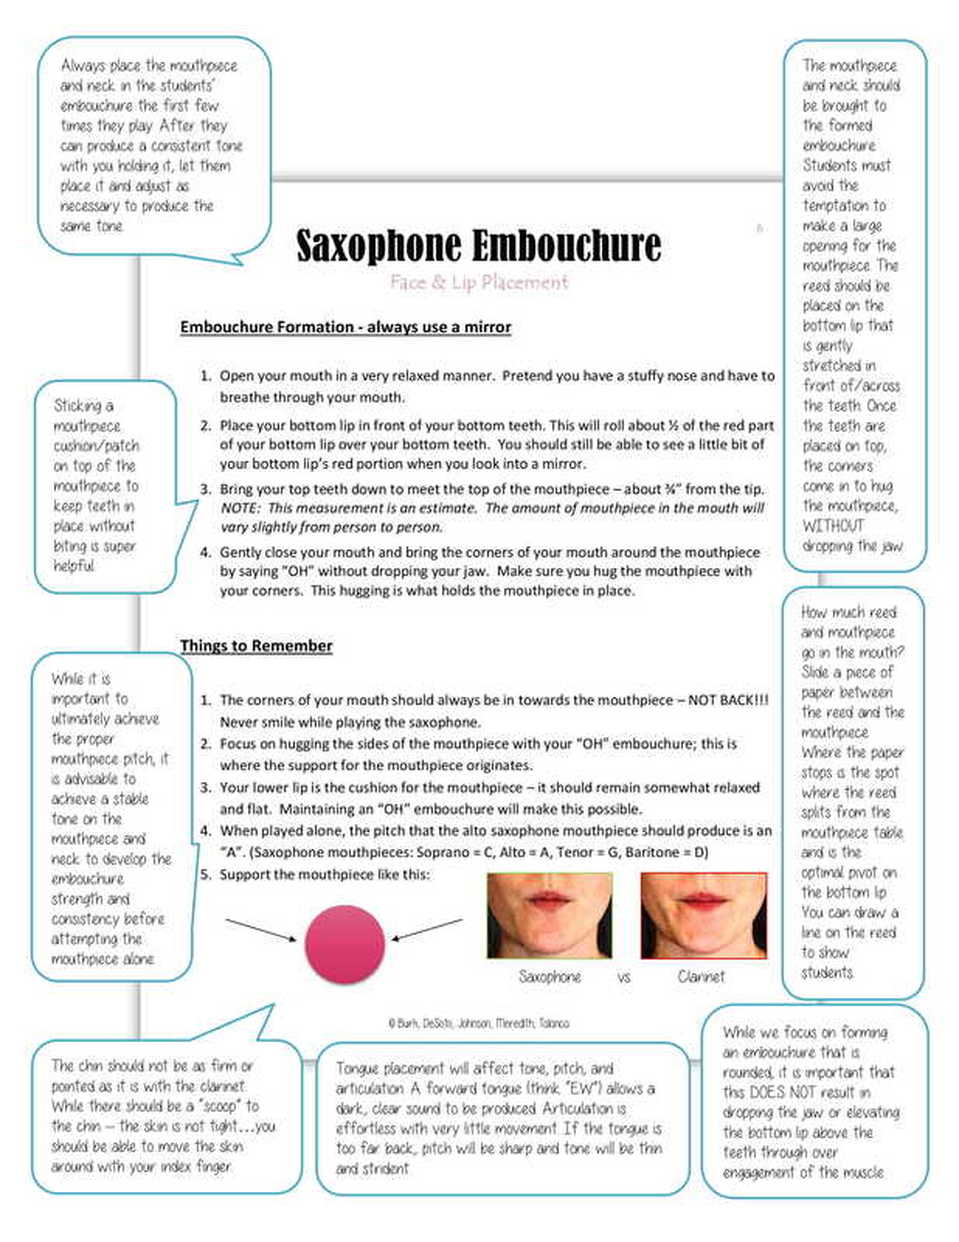
When selecting students for the saxophone, look for students either whistle or form a whistle embouchure. The saxophone embouchure is ‘softer’ than that of the clarinet. Look for a flat chin when having a conversation with the potential sax student. The bottom lip of the saxophone player should have a ‘squishy-firm’ texture.
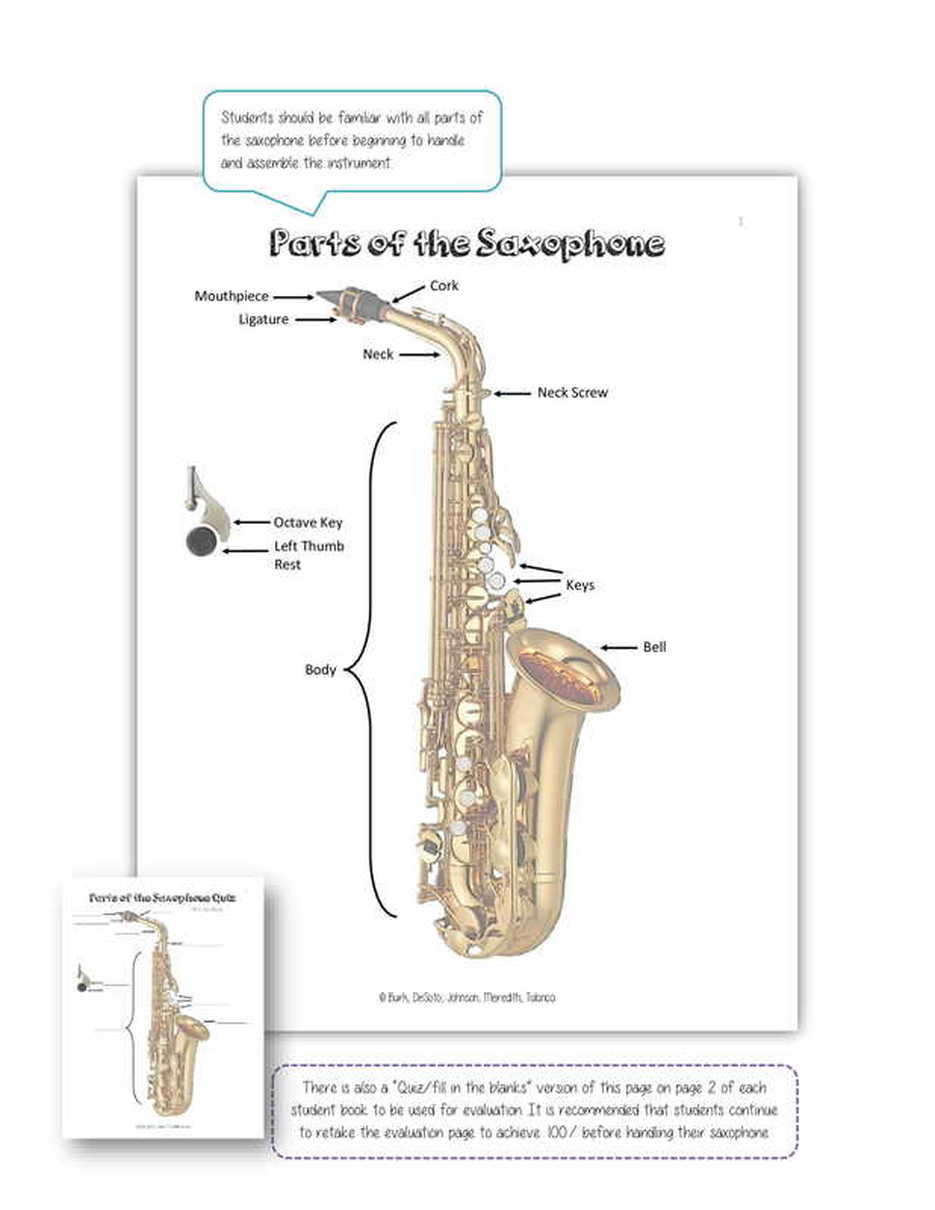
All students should be tested on the parts of the saxophone prior to handling the instrument. Give a verbal and written assessment to make sure they understand the parts of the instrument.
All students should be tested on the parts of the saxophone prior to handling the instrument. Give a verbal and written assessment to make sure they understand the parts of the instrument.


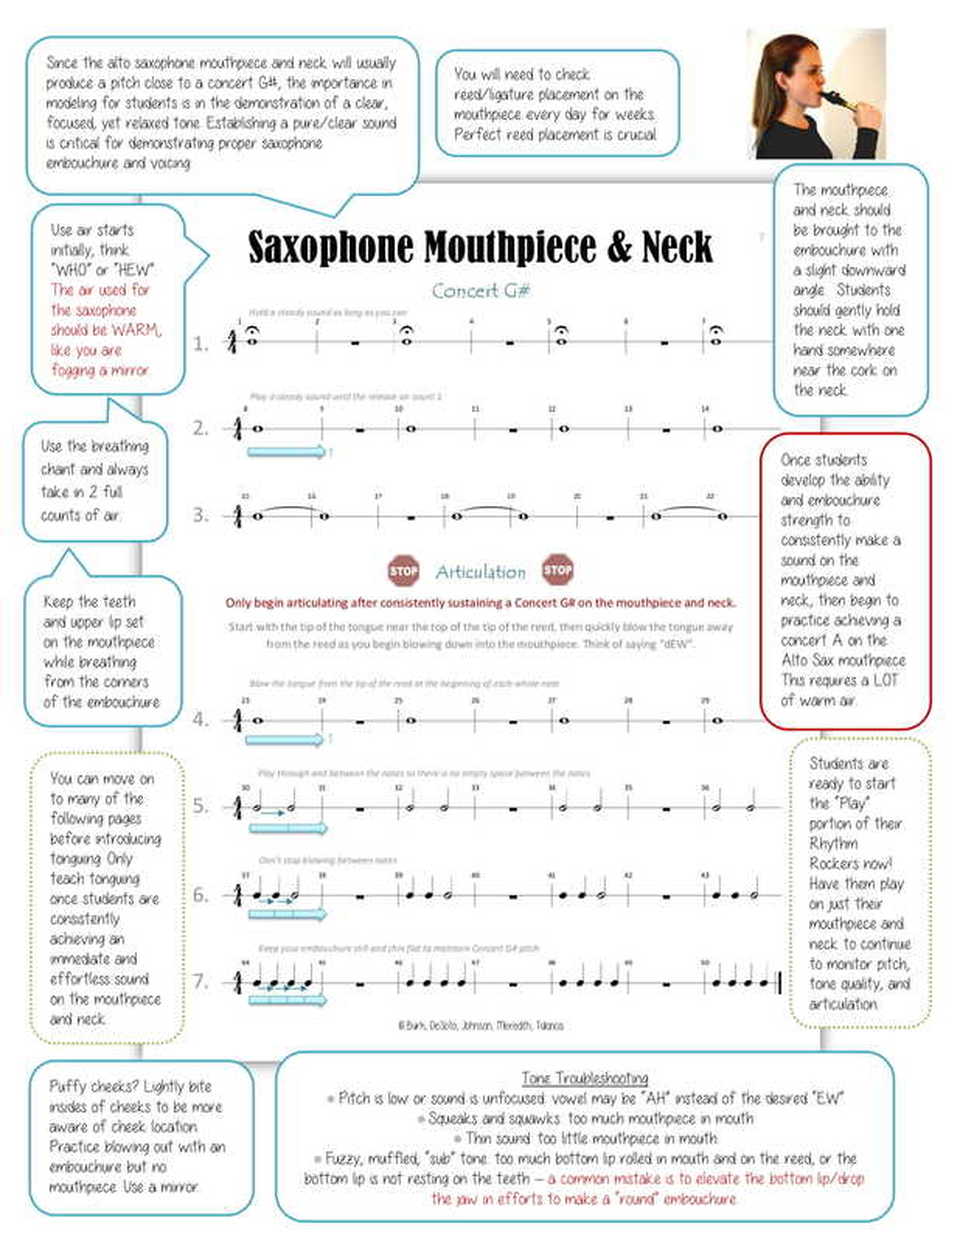
Exercises for Tone Development on Saxophone
- Long Tones – start with MP & neck on exercises before going to the assembled instrument
- Use a metronome at a slow setting
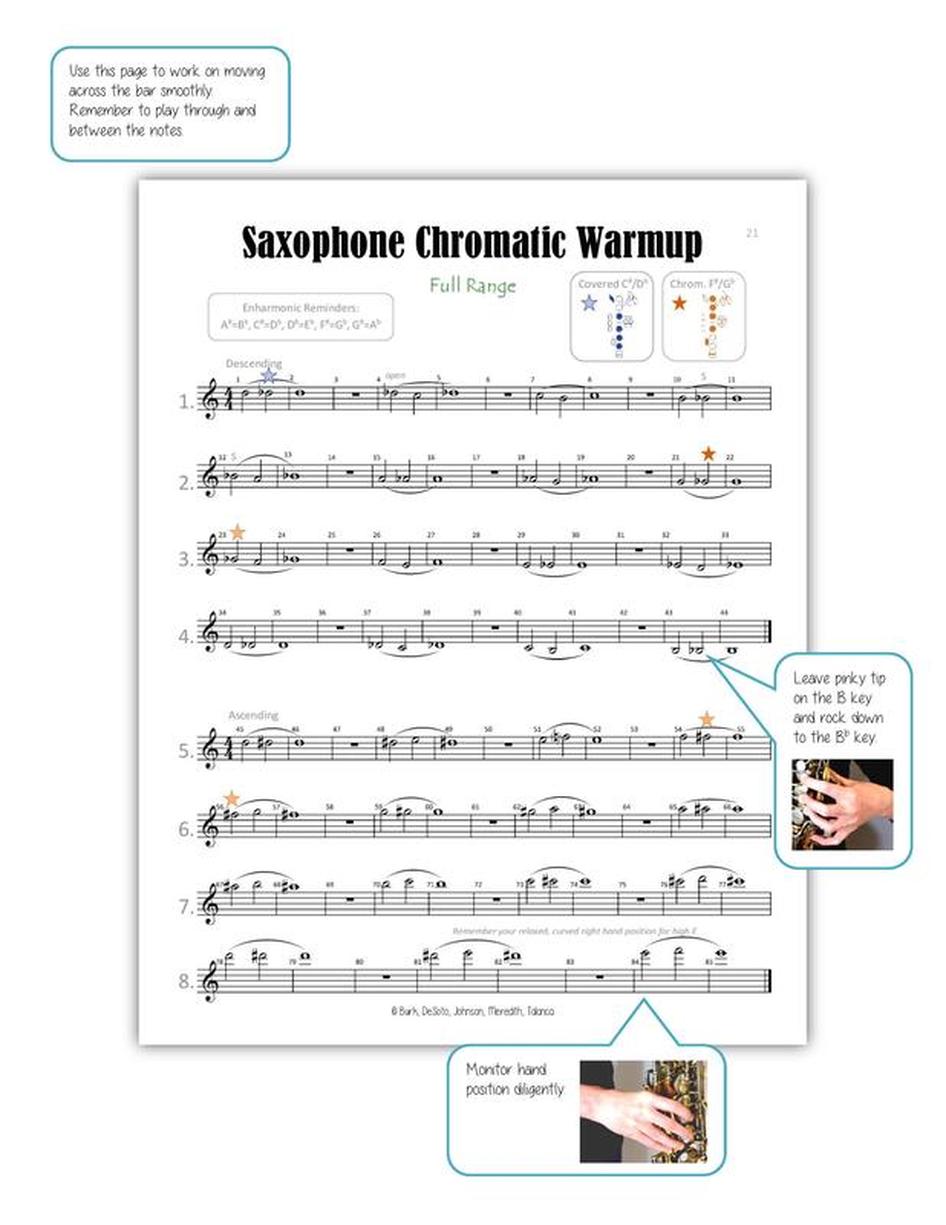
- Use a chromatic study so as to work each note on the instrument
- Know what a characteristic sound on clarinet sounds like before you start. Use a reference recording if necessary.
- Make each note sound the same
- Take time to listen and redo undesirable sounds.
- Begin every practice with long tones
- Use these to work on voicing
- Low Bb to high F 3 ledger lines above the staff
- Use a long tone study and add crescendos and decrescendos
- Students must learn to control the velocity of air through the reed with the embouchure
- Maintaining a constant pitch/intonation throughout a dynamic change is how students develop breath control
- This is a difficult concept for young students, so spend a lot of time on developing soft dynamics, using embouchure and air.
- Pitch flattens in louder dynamics
- Pitch sharpens in softer dynamics
- For louder dynamics
- Allow the reed to open up more so that more volume of air can pass through
- For softer dynamics
- Support the reed more from the sides to allow less volume of air to pass through
- Flat Tendencies
- C# in the staff (alt. fingering – octave key and 3rd finger
- A, A#, B, C, C# above the staff
- Sharp Tendencies
- Bb, B, C, C#, & D below the staff
- D, D#, & E in the staff (add low B key on D’s for alto only)
- D, D#, E, F above the staff
- Use a “THEH” syllable
- The anatomy of an articulation syllable should be consonant, vowel, and “H”
- The “H” at the end Is very important for projecting the sound and creating resonance
- The “H” helps to propel the sound and helps students avoid stopping the sound with a consonant
- Use a “THEH” syllable to release air
- The tongue should touch the sharp edge of the reed just slightly back from the tip of the tongue
- Strive for one tiny row of taste buds on the reed
- Articulation Style
- Determined by how long the tongue stays on the reed
- Legato – fast, light motion
- Staccato – the tongue is on the reed longer in very fast passages; otherwise, the tongued note would be 50% sound and 50% silence ending with the “H”
- Strength of Articulation
- Is determined by the energy of the air at the fronts of notes
- The anatomy of an articulation syllable should be consonant, vowel, and “H”
- Too heavy or a ‘popping’ sound
- Generally too much pressure from the tongue
- Could be too much tongue on the reed
- Use only one row of taste buds on the sharp edge of the reed
- The reed could be old or too soft
- Suggish tongue or response
- Make sure the reed isn’t too hard
- Student may be moving the back of the tongue – keep the motion to the front part of the tongue
- ‘Pecky’ tonguing
- Not following through with air – “H”
- Just interrupt the air stream with the tongue, do not stop the air
- Anchor tonguing
- This is where the student anchors the tip of the tongue against the bottom teeth and uses the “thick” part of the tongue, past the tip, to articulate
- Slapping the reed
- This is generally when a student uses most of the surface of the tongue past the tip of the reed. It makes a “thunking” sound.
- This is a technique employed for special effect articulations, however. Not something to teach a beginner!
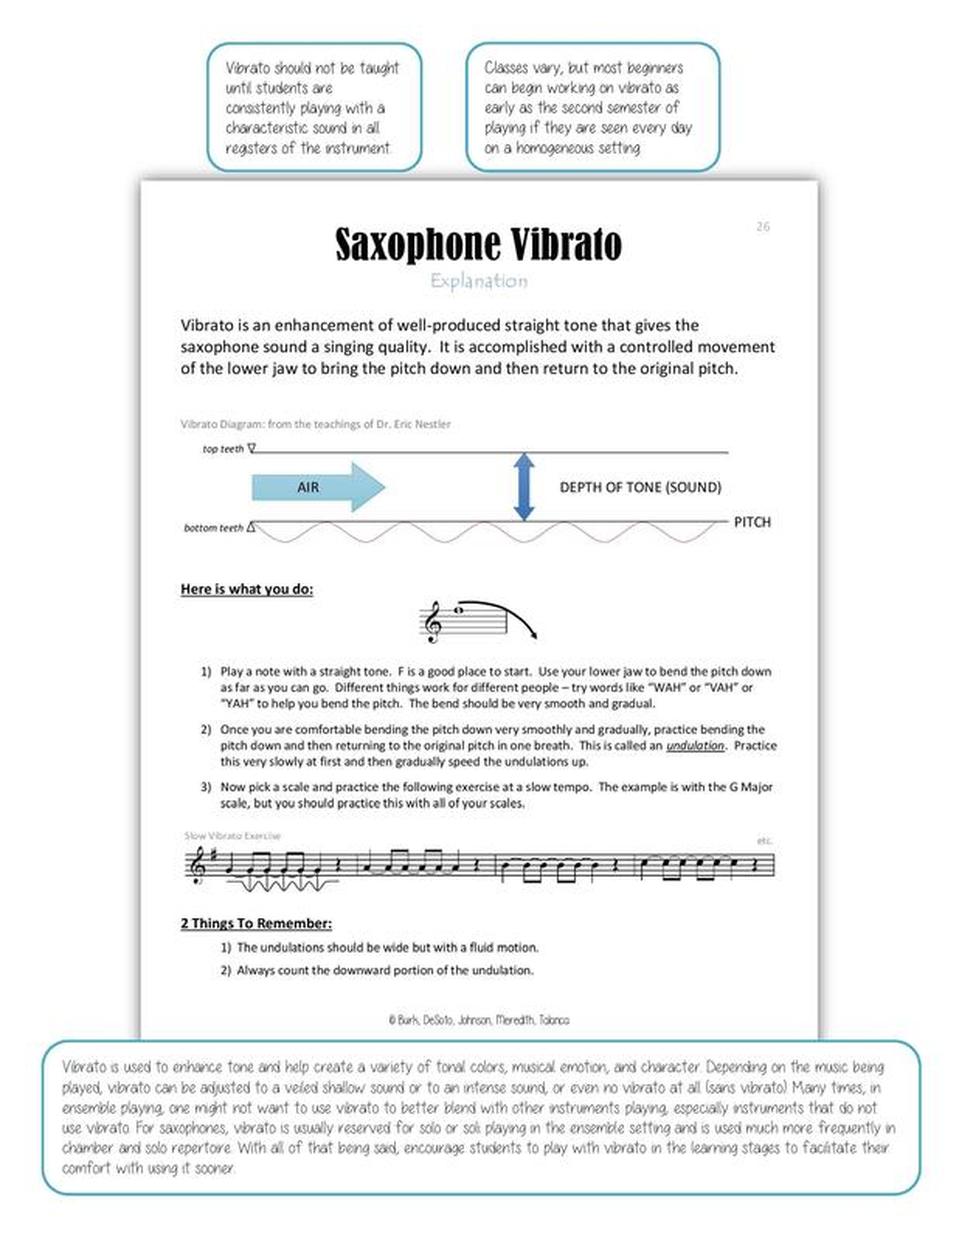
- Used to enhance the music
- It should never be a distraction
- It should always be in the character of the music being played
- It should spin/flow naturally and become part of the tone
- It is used as an expressive tool
- Subdivision Method (Jaw Vibrato)
- Use the syllable “VAH” or “YAH”
- You can be specific at first on how many ‘pulses’ or pitch variations you would like to hear per beat
- Eventually the vibrato will flow more naturally and without having to concentrate so intensely on the number of pulsations
- After a while, students will find it difficult not to use vibrato when they play
- Choo-Choo Train Method
- Start the variations in pitch slowly and gradually speed them up like a train accelerating
- Do this until the vibrato is at the desired speed
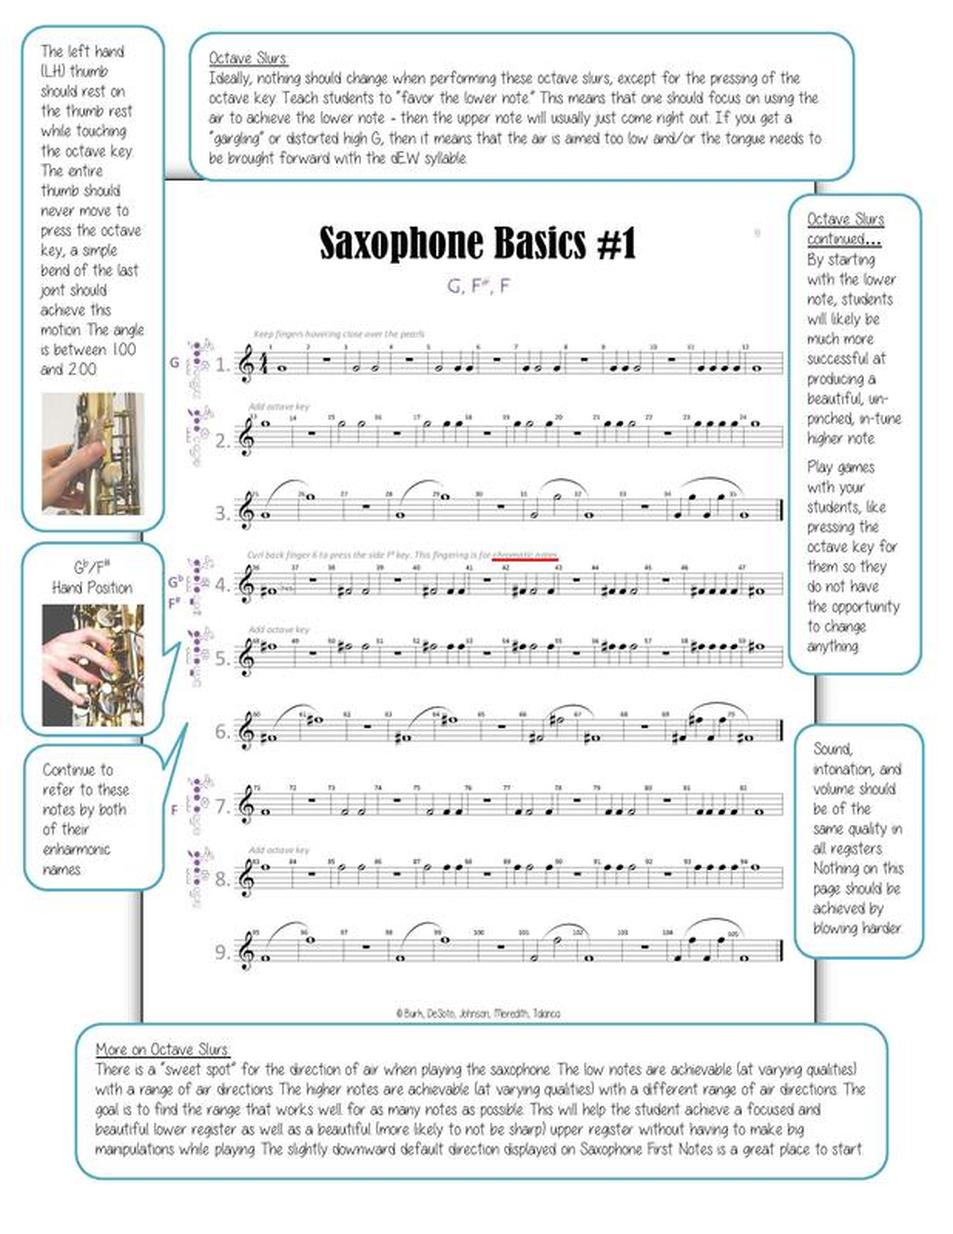
- Developing finger/tongue technique
- Start early with ‘finger wiggles’
- Simple exercises that go back and forth between 2 or 3 notes within the range of the students
- Start slow and gradually speed up the exercises establishing a good habit slow to fast
- Use scales to develop speed
- Remember that hand position is extremely important and can keep a student from progressing
- Watch for finger height; keep them low to the keys
- Begin with tetra chords, then one octave scales, two octave scales, and so on
- Fingerings in the third octave can sometimes be confusing for the beginning saxophonist – isolate these portions of the scales and work on the coordination of the fingers and memorization of the finger combinations
- The fingerings in the low register that incorporate the use of all of the left hand pinky keys can be confusing at first. Spend time developing that low range for better results in the upper register
- Use saxophone specific method books for further development exercises
- Start early with ‘finger wiggles’
